반응형

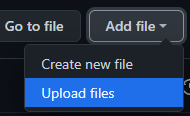
통은 저장소를 생성한뒤 'Upload files'를 하면 업로드되지만
파일 갯수가 너무 많을 경우 안되므로

큰 프로젝트를 업로드할때는 이 방법으로 하자
1. Git을 설치한다.
Git - Downloads
Downloads macOS Windows Linux/Unix Older releases are available and the Git source repository is on GitHub. GUI Clients Git comes with built-in GUI tools (git-gui, gitk), but there are several third-party tools for users looking for a platform-specific exp
git-scm.com
2. GitHub에 새 저장소를 생성한다.

왼쪽 상단에서 클릭
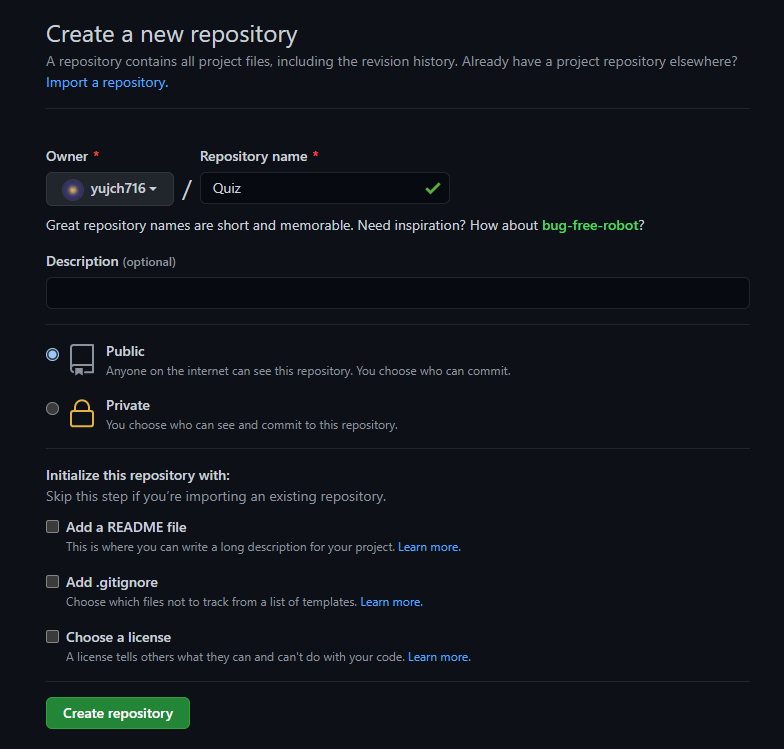
저장소 이름을 정하고 생성한다.
3. 생성된 저장소의 주소를 기억해두자.

.git으로 끝나는 주소이다.
4. 업로드하고 싶은 프로젝트의 폴더를 마우스 우클릭 > Git Bash Here

5. 초기 설정을 해준다.
git config --global user.name "유저이름"

git config --global user.email "유저 이메일"
- 이 창에서는 Ctrl+v로 붙여넣기 안됨 => Shift + Ins 사용하자

6. 파일 준비
git init      #.git 파일 생성

git add .     #선택한 프로젝트 폴더 내의 모든 파일 관리
		-> 특정파일만 하고 싶다면  git add 파일이름.파일형식  ex) git add a.txt

git status    #상태확인

git commit -m "주석"     #커밋
7. 업로드하기
git remote add origin {위 3번에서 저장한 깃허브 저장소 주소}

git push -u origin master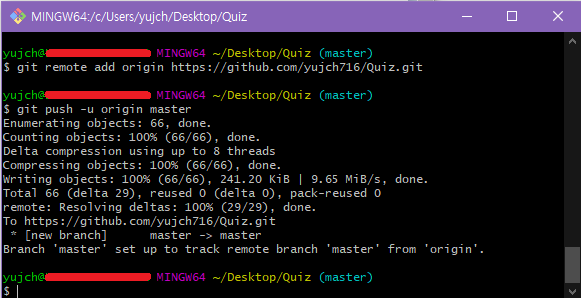
8. 프로젝트 업로드 완료

9. 프로젝트 설명 적기

설정(톱니바퀴) 클릭

Description에 적고 저장
[복사 사용]
git config --global user.name "[사용자아이디]"
git config --global user.email "[사용자이메일]"
git init git add .
git commit -m "first upload"
git remote add origin [GIT주소]
git push -u origin master
반응형

댓글